Curating Publications on Wikidata
This blog post is a tutorial on how to curate the links between a researcher and scholarly works (e.g., pre-prints, publications, presentations) on Wikidata using Scholia and the Author Disambiguator tool.
Ensure content is available
While Wikidata is full of useful scholarly information, it’s up to the community to include new content. Therefore, before we go about curating links between your Wikidata entry and your publications, we first have to ensure there are Wikidata entries for your publications. There are several ways to do this, but this tutorial will focus on getting the list of your publications from your citation manager.
This tutorial will assume you’re using Mendeley, a citation manager that can export EndNote XML documents. This tutorial might be later extended to include an example with Zotero, which can also export EndNote XML documents. After opening the application, follow these instructions:

- Select the publications you want to put into Wikidata
- Right click on one of them
- Select “export”
- Choose “EndNote XML” as the filetype
Uploading to Wikidata
- Create an account on Wikidata. Keep in mind this is not the same as the Wikidata entry about you.
-
Store your Wikidata credentials in a configuration file at
~/.config/wikidata.ini(where~means your home directory). It should look like:[wikidata] username = <your username here> password = <your password here> - Install Python.
-
Run the following in your terminal:
$ pip install citation-url[endnote]
$ python -m citation_url.endnote <LOCAL FILE PATH TO YOUR ENDNOTE FILE>
This will now parse your EndNote XML file and do its best to populate Wikidata with all the DOIs, PubMed identifiers, PMC identifiers, arXiv identifiers, PDF links, and other references.
Update your Wikidata entry
This tutorial already assumes you’ve created a Wikidata entry. If you haven’t done this already, go back and read this tutorial. Before continuing, make sure that you’ve edited the “synonyms” on your Wikidata entry so it has a wide variety of how your name might have been written in publication. This means different ordering of first/last name, different usages of single letters versus writing out in full, sometimes omitting the middle name, using dots after letters or not, etc.
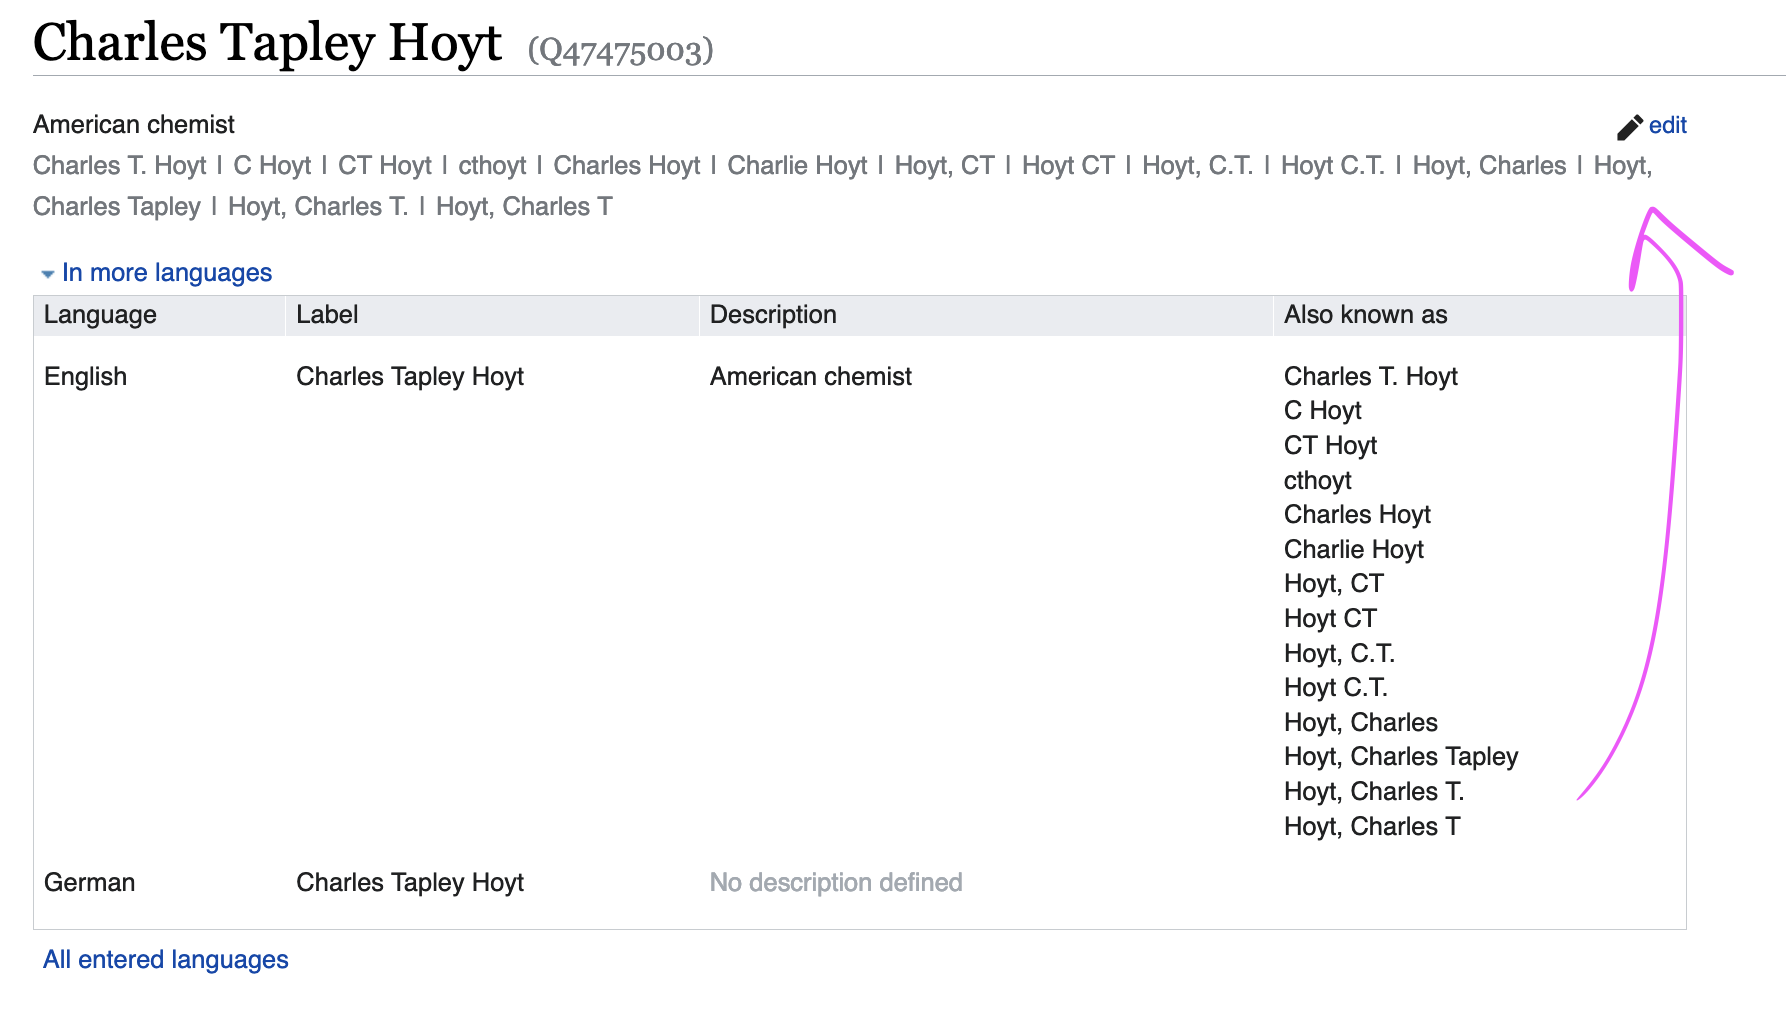
This step is crucial because the curation interface in the next step relies on direct string matching between this list of synonyms and what the Wikidata Integrator was able to pull from CrossRef, EuropePMC, and other metadata resources.
Curate Wikidata using the Author Disambiguator
- Follow this link to sign in to the Author Disambiguator tool using your Wikidata username/password. We’ll need this for later steps.
- Scholia is a frontend for navigating
scholarly data within Wikidata. Navigating to your Scholia curation by
replacing
<YOUR Q NUMBER>inhttps://scholia.toolforge.org/author/<YOUR Q NUMBER>/curation#missing-author-resolvingwith your Wikidata identifier. It starts with a Q followed by some numbers coming directly after the title on your page. For example, mine isQ47475003. You can follow this link to see my curation page on Scholia as an example to make sure you’re in the right place for yours. -
Click the link next to the specific text string you want to curate:

-
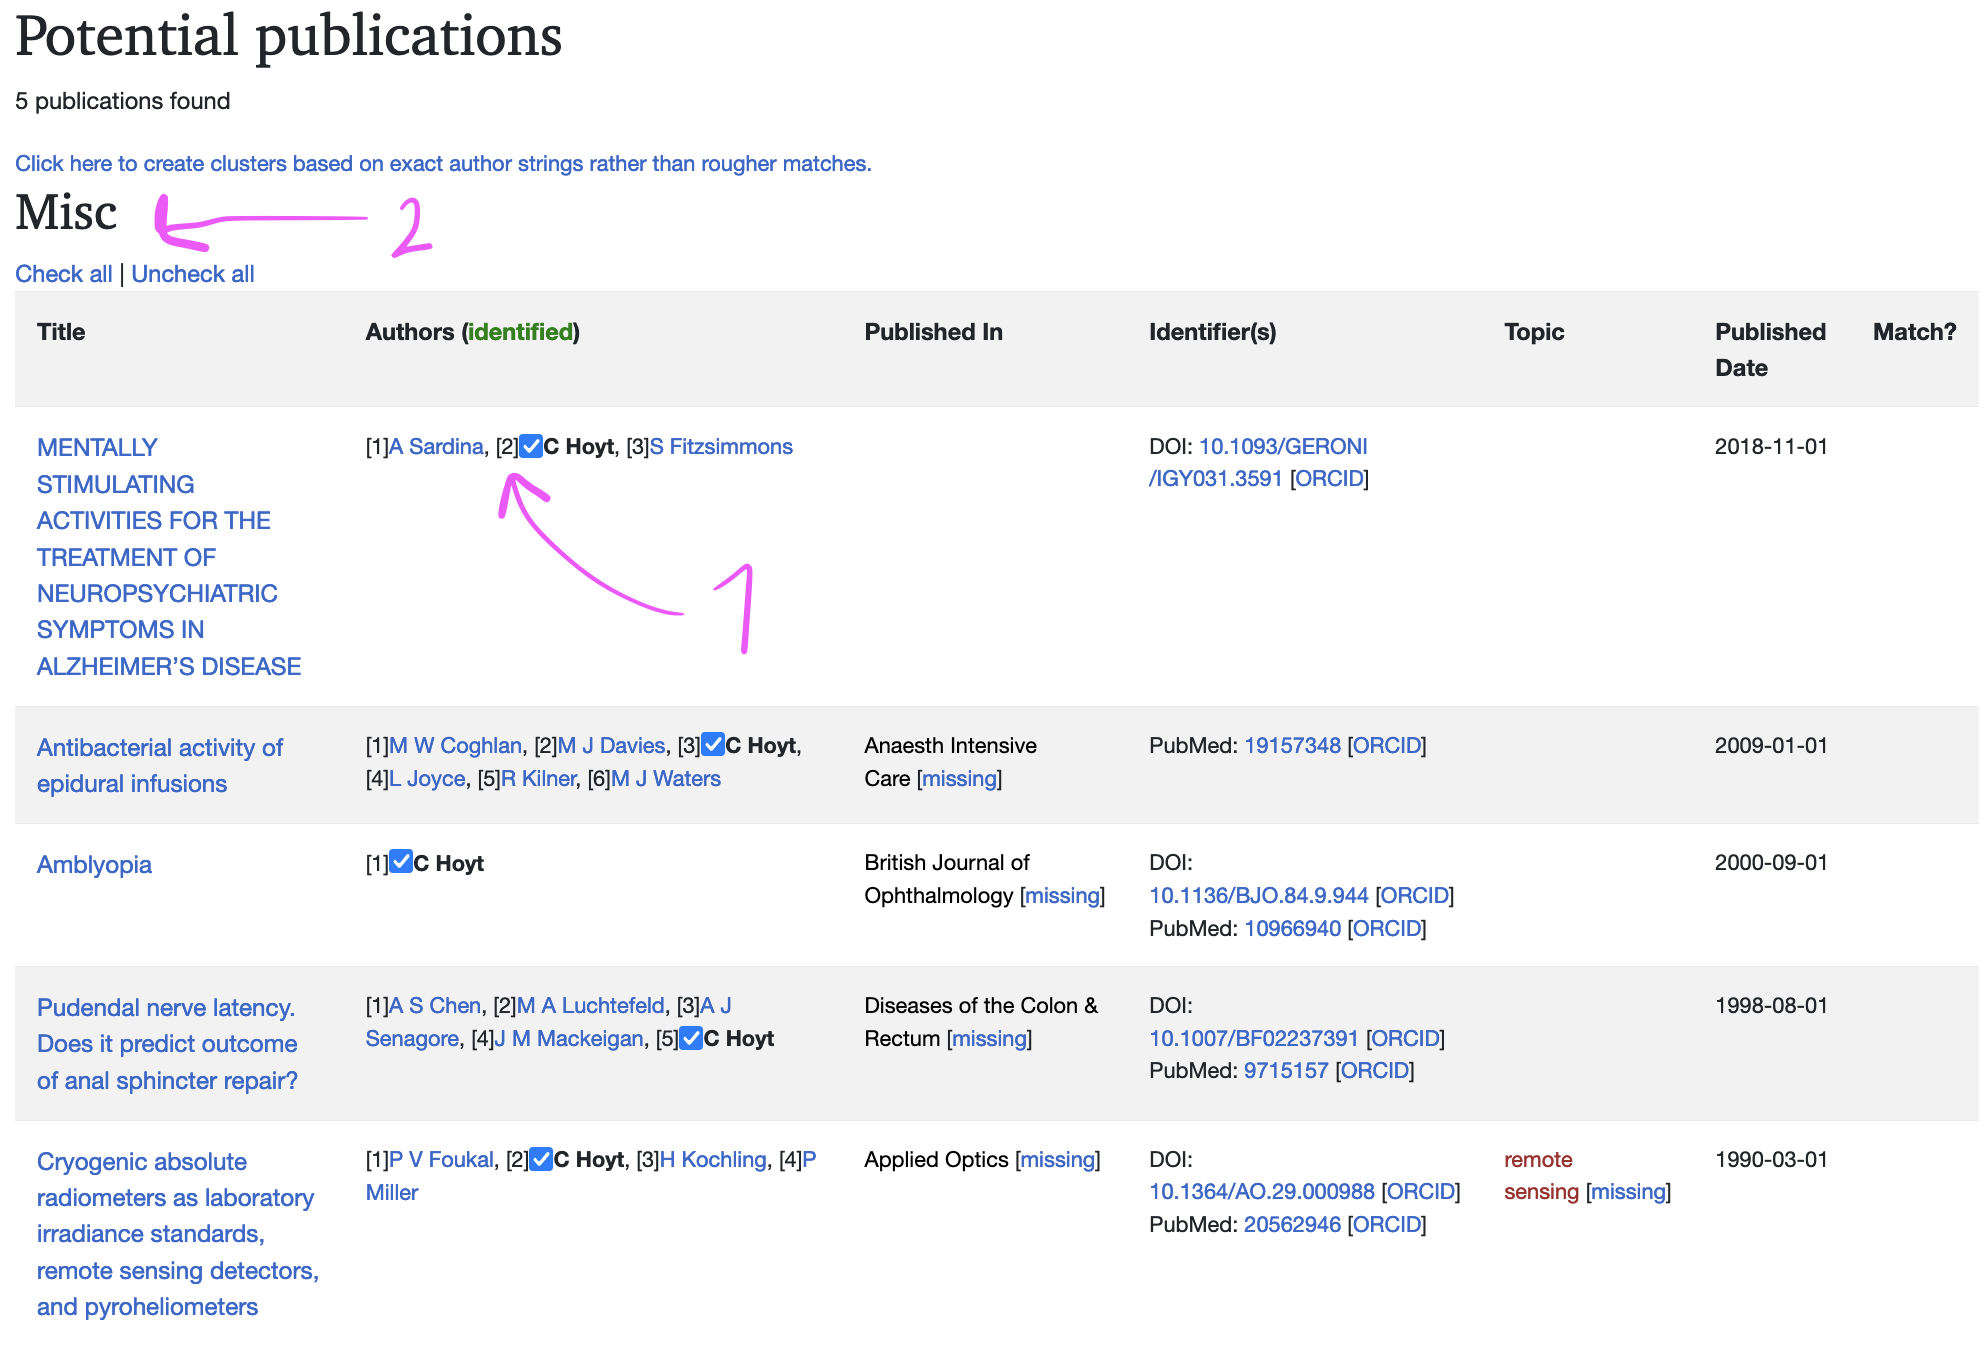
This will bring you to the Author Disambiguator page. Click the checkboxes on the publications that are yours (1), or use the boxes to check entire groups (2).
-
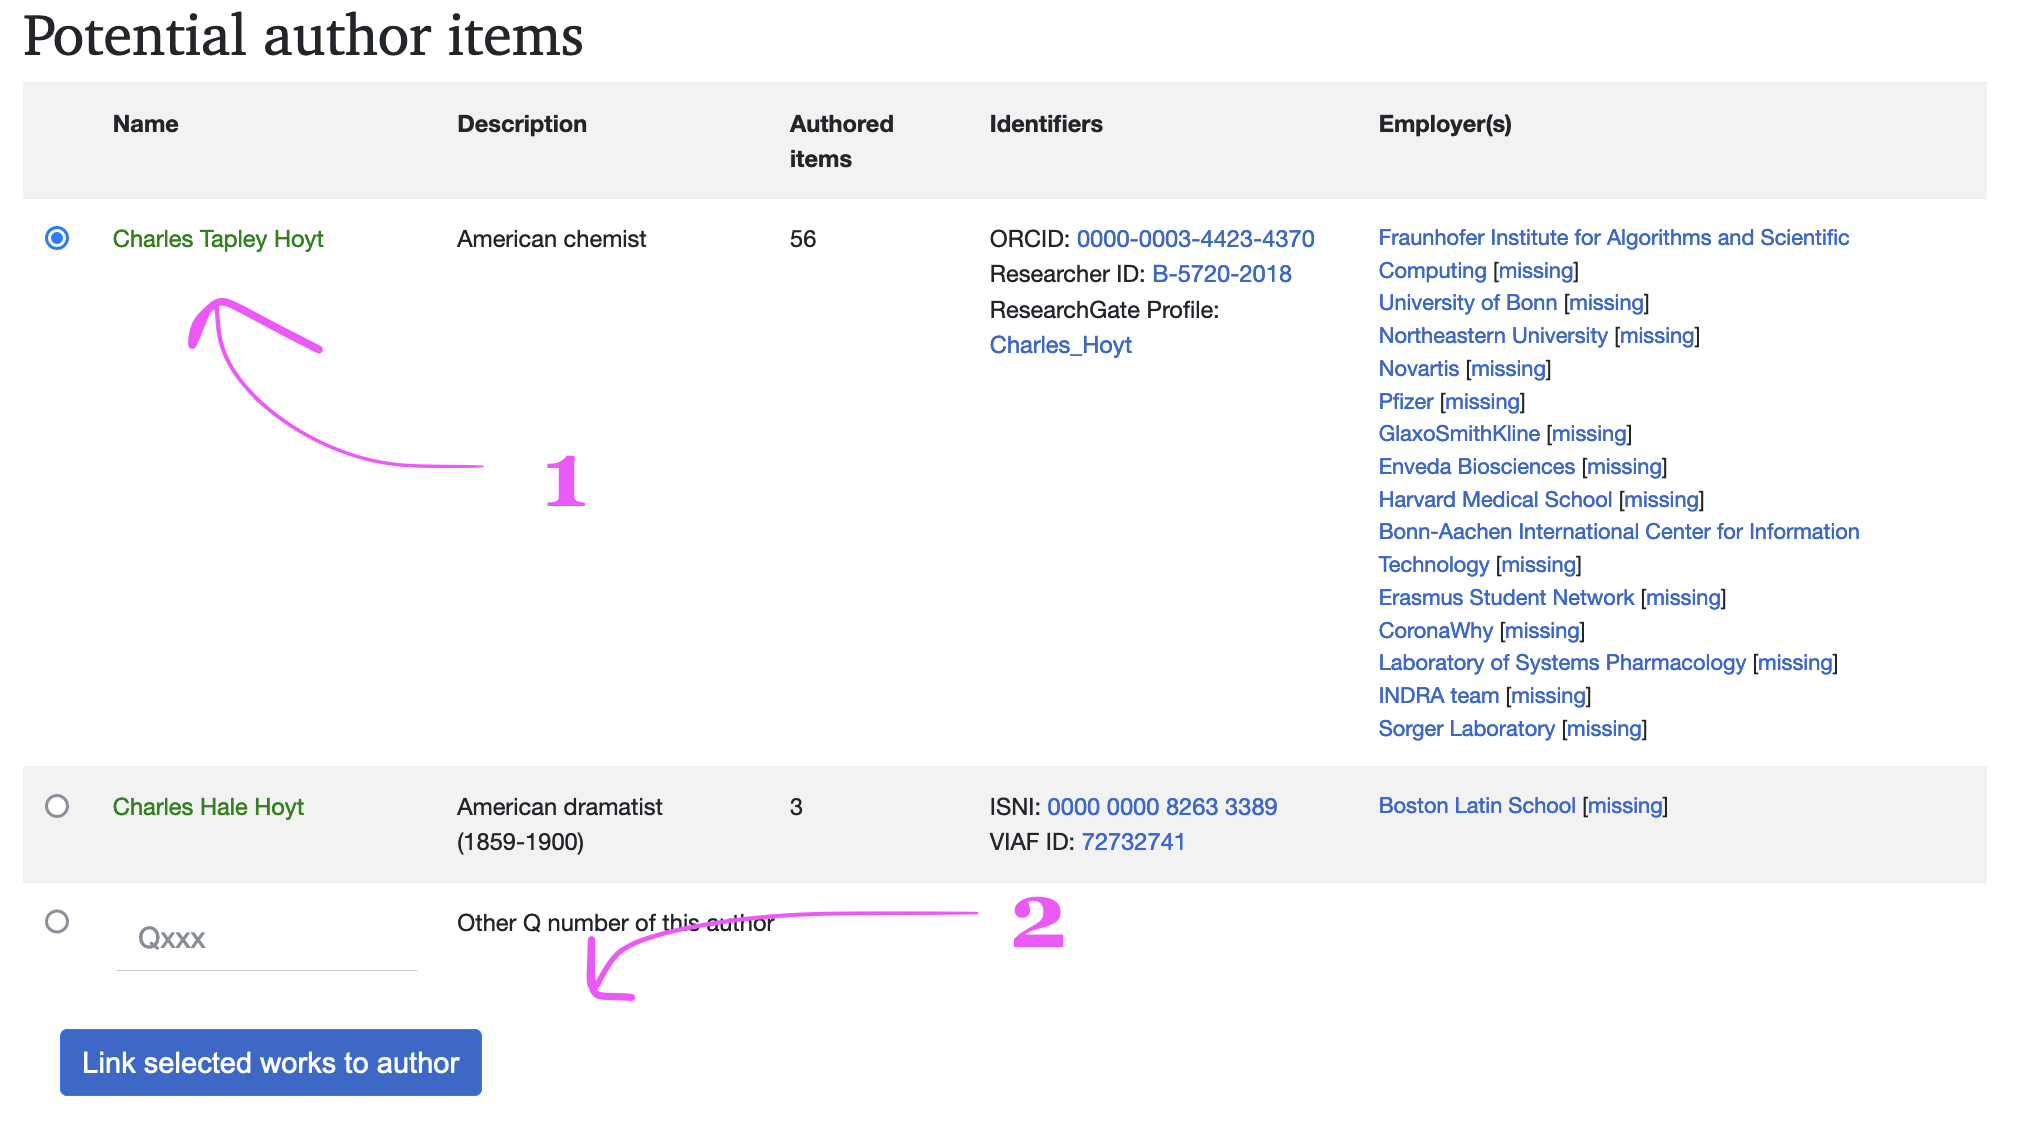
Scroll down past all the check boxes to the section labeled Potential Author Items. Select the radio box corresponding to your Wikidata entry (1), then click Link Selected Works to Author (2).
- A new window will appear so you can track the status of the job, but you can close it and it will finish in the background. Give a few minutes, then your profile on Scholia will be updated.